Connect DB2Rest to CockroachDB

In the previous article, the CockroachDB cluster was created and the employee table was created in the default database.
In this article, a DB2Rest instance running on Koyeb will be used to connect to CockroachDB instance.
Refer to the article on how to deploy DB2Rest on Koyeb cloud.
Configure Koyeb App Service
Now in order to connect the DB2Rest instance to CockroachDB -
the CockroachDB database URL, user and password should be used. On the Koyeb Apps dashboard click on Create Service + button.
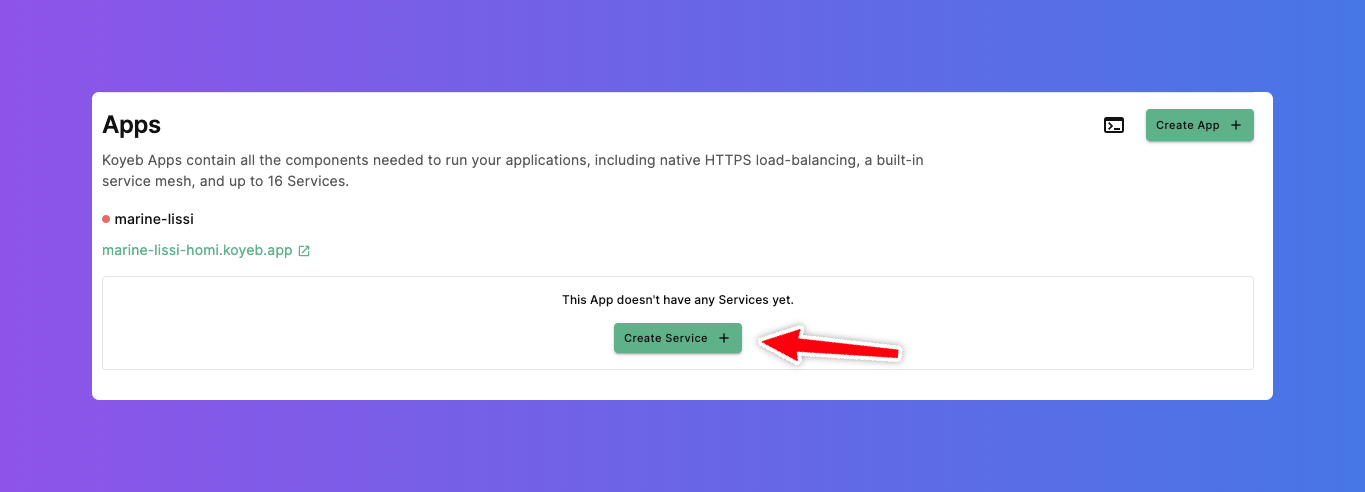
Now the follow the steps as outlined in deploy DB2Rest on Koyeb cloud to configure the service in the application.
Configure Environment Variables
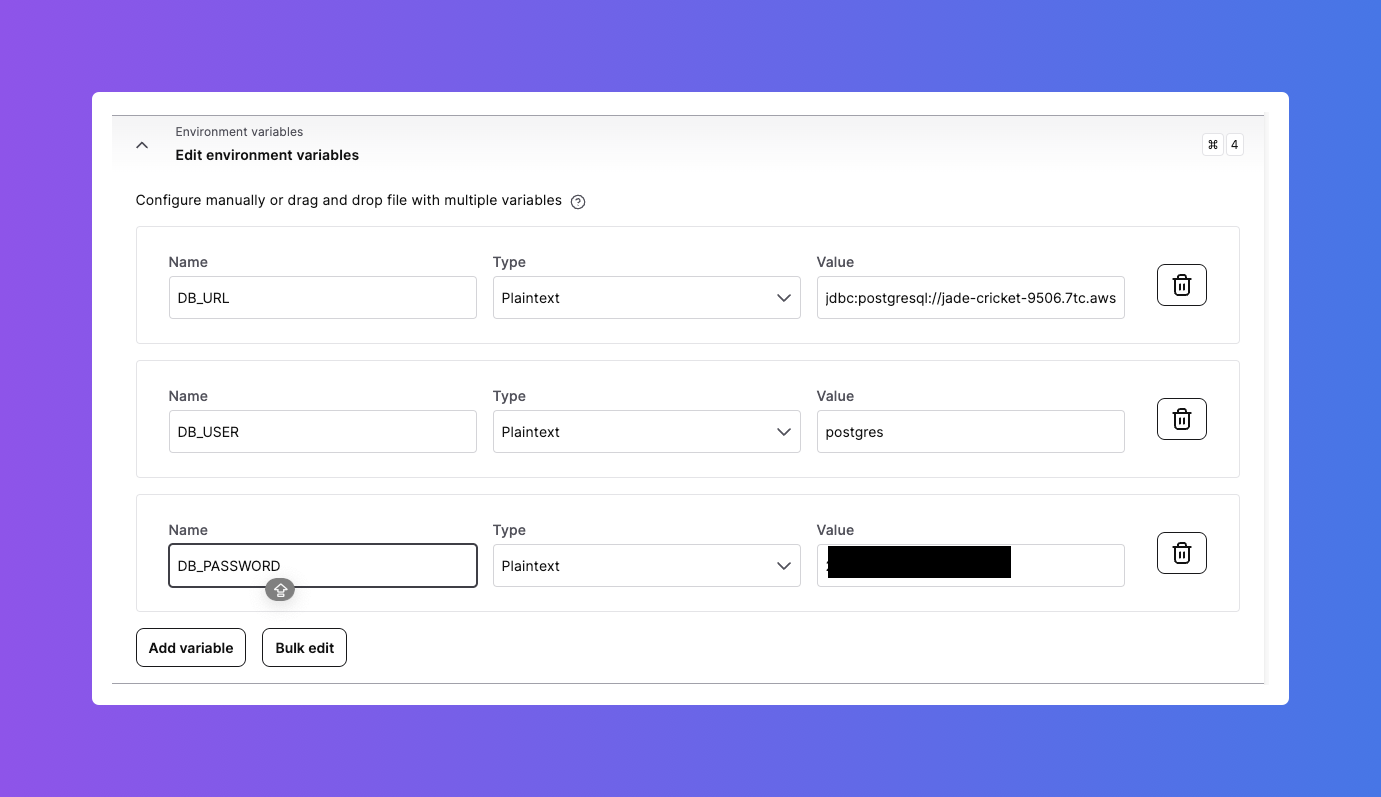
Add the environment variables as shown below
- DB_URL=
jdbc:postgresql://jade-cricket-9506.7tc.aws-eu-central-1.cockroachlabs.cloud:26257/defaultdb?sslmode=verify-full - DB_USER=
postgres - DB_PASSWORD=
<GENERATED PASSWORD>
Configure Exposed Port
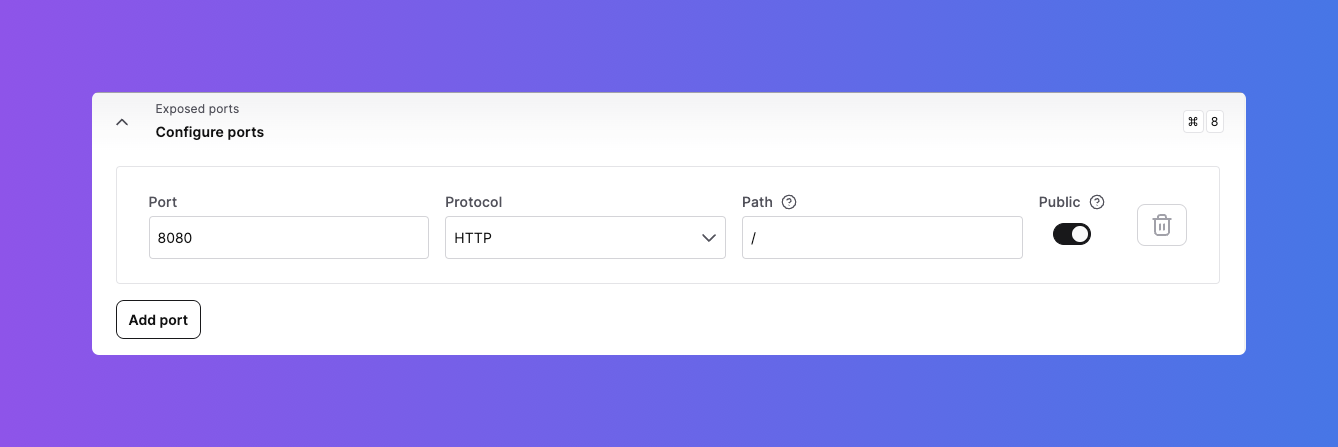
Set the exposed port to 8080
Configure Health Checks
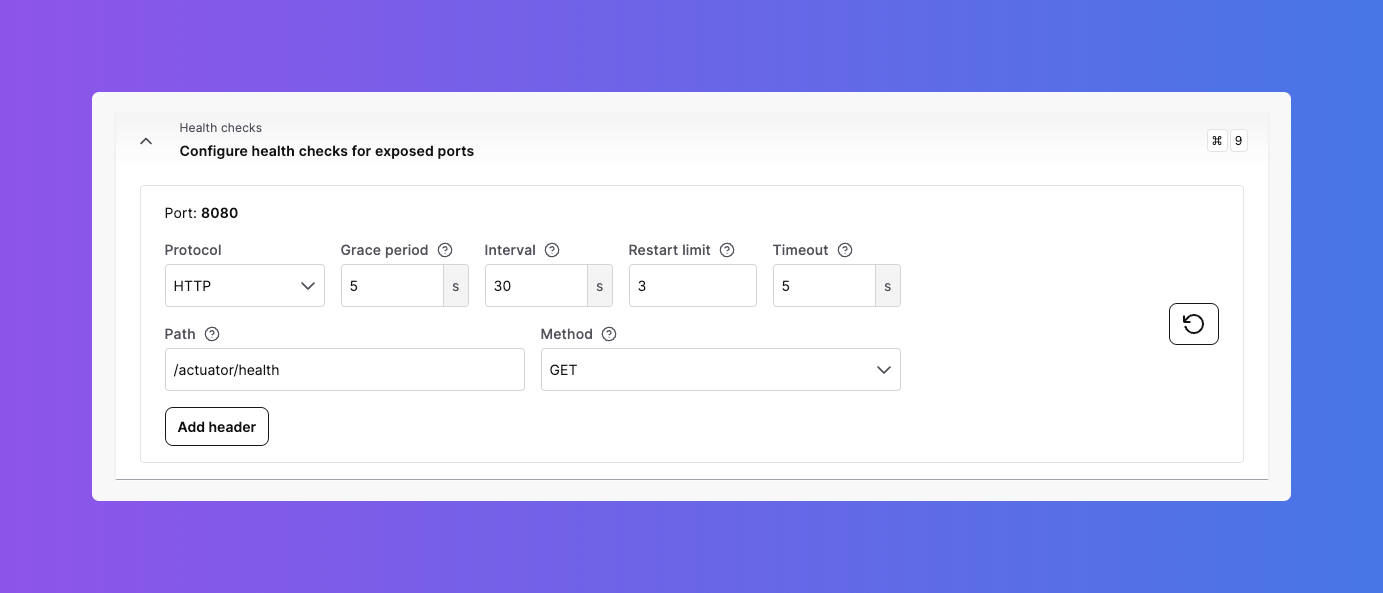
Finally, configure health checks to point to the actuator URL as shown below.
Now click on the Deploy button to deploy the service.
Test DB2Rest App Service
Once the deployment is successfully completed, it is time to test the application service.
Check DB2Rest Health
It is very easy to verify DB2Rest application service with the actuator endpoint as shown below:
- cURL
- HTTPie
curl --request GET \
--url 'https://marine-lissi-homi.koyeb.app/actuator/health?=' \
--header 'User-Agent: insomnia/8.6.1'
http GET 'https://marine-lissi-homi.koyeb.app/actuator/health?=' \
User-Agent:insomnia/8.6.1
The actuator health check service in DB2Rest will return the following response:
HTTP/1.1 200
Content-Type: application/json
Transfer-Encoding: chunked

{
	"status": "UP"
}
The status attribute shows that the application service is ready to handle database operations.
Insert Row
- cURL
- HTTPie
curl --request POST \
--url https://marine-lissi-homi.koyeb.app/employee \
--header 'Content-Type: application/json' \
--header 'User-Agent: insomnia/8.6.1' \
--data '{
"first_name" : "Salman",
"last_name" : "Khan",
"email" : "[email protected]",
"created_on" : "2015-04-14T11:07:36.639Z"
}'
echo '{

"first_name" : "Salman",
"last_name" : "Khan",
"email" : "[email protected]",
"created_on" : "2015-04-14T11:07:36.639Z"

}' |  \
http POST https://marine-lissi-homi.koyeb.app/employee \
Content-Type:application/json \
User-Agent:insomnia/8.6.1
HTTP Response
{
	"row": 1,
	"keys": {
		"id": 1
	}
}
Read Row
- cURL
- HTTPie
curl --request GET \
--url https://marine-lissi-homi.koyeb.app/employee \
--header 'User-Agent: insomnia/8.6.1'
http GET https://marine-lissi-homi.koyeb.app/employee \
User-Agent:insomnia/8.6.1
HTTP Response
[
	{
		"id": 1,
		"first_name": "Salman",
		"last_name": "Khan",
		"email": "[email protected]",
		"created_on": "2015-04-14T11:07:36.639+00:00"
	}
]
Create Oracle Objects
CREATE TABLESPACE tbs_perm_01 DATAFILE 'tbs_perm_01.dat' SIZE 20M ONLINE;
CREATE TEMPORARY TABLESPACE tbs_temp_01 TEMPFILE 'tbs_temp_01.dbf' SIZE 5M;
CREATE USER LARRY IDENTIFIED BY LARRY DEFAULT TABLESPACE tbs_perm_01 TEMPORARY TABLESPACE tbs_temp_01 QUOTA 20M on tbs_perm_01;
GRANT create session TO LARRY; GRANT create table TO LARRY; GRANT create view TO LARRY; GRANT create any trigger TO LARRY; GRANT create any procedure TO LARRY; GRANT create sequence TO LARRY; GRANT create synonym TO LARRY;
Finally, refer to the DB2Rest documentation for further learning and exploring API features.
For help, visit us on Discord or our GitHub Discussions